GUIDE 03 · R DATA ANALYSIS
A practical workflow for moving data analysis forward with Wisp Science + R.
An illustrated guide to creating a local project, preparing R through conversation, managing packages and data, and turning an analysis request into results that remain open to inspection.
Original article published
01 / What you will learn
What you will learn
- Create a Wisp Science project and prepare an R runtime for the work.
- Review installation commands and safety approvals before allowing system changes.
- Install the required R packages while recording their exact versions.
- Bring small and large datasets into a project without losing track of the originals.
- Describe an analysis as a concrete plan with inputs, outputs, and checkpoints.
- Inspect code, logs, tables, figures, and environment details before accepting a result.
02 / Before you begin
Before you begin
- A current Wisp Science installation and a local project folder.
- A configured model provider; the original article uses DeepSeek as its example.
- Network access, disk space, and permission to install R and required packages.
- A backup of any irreplaceable source data before analysis begins.
1. Begin with a project, not an isolated prompt
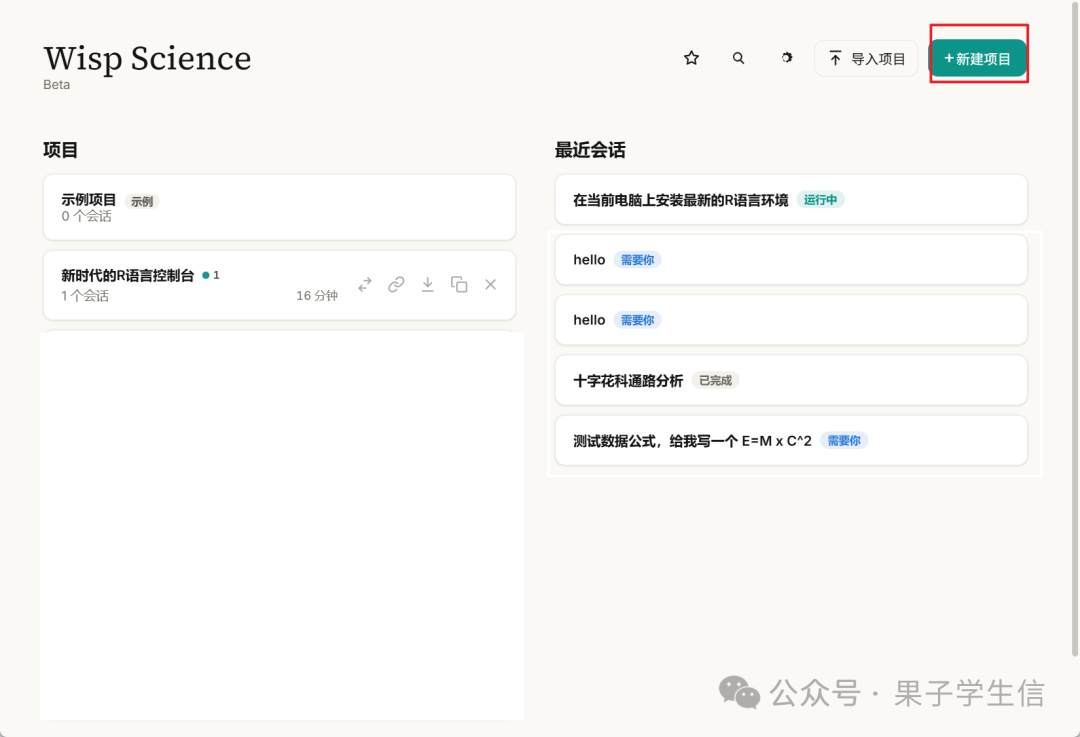
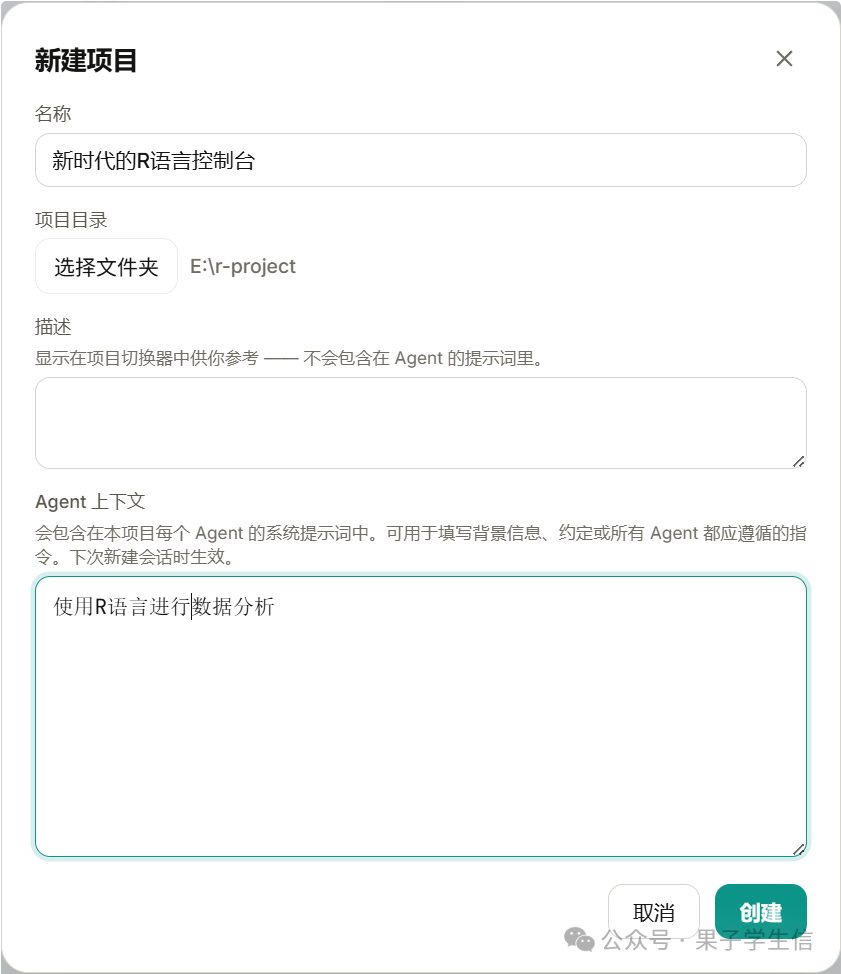
The original walkthrough starts by installing Wisp Science, configuring a model provider, and creating a new project. It uses a DeepSeek API key, but the durable idea is to configure a supported provider before beginning the analysis.
Choose a project folder that can remain with the work. Source files, scripts, logs, figures, tables, and environment records should all be easy to find after the conversation has ended.
- Use a project name tied to the research question or dataset.
- Keep provider credentials out of scripts and exported reports.
- Tell Wisp Science where results should be written before a long run begins.
2. Ask Wisp Science to prepare R, then review privileged actions
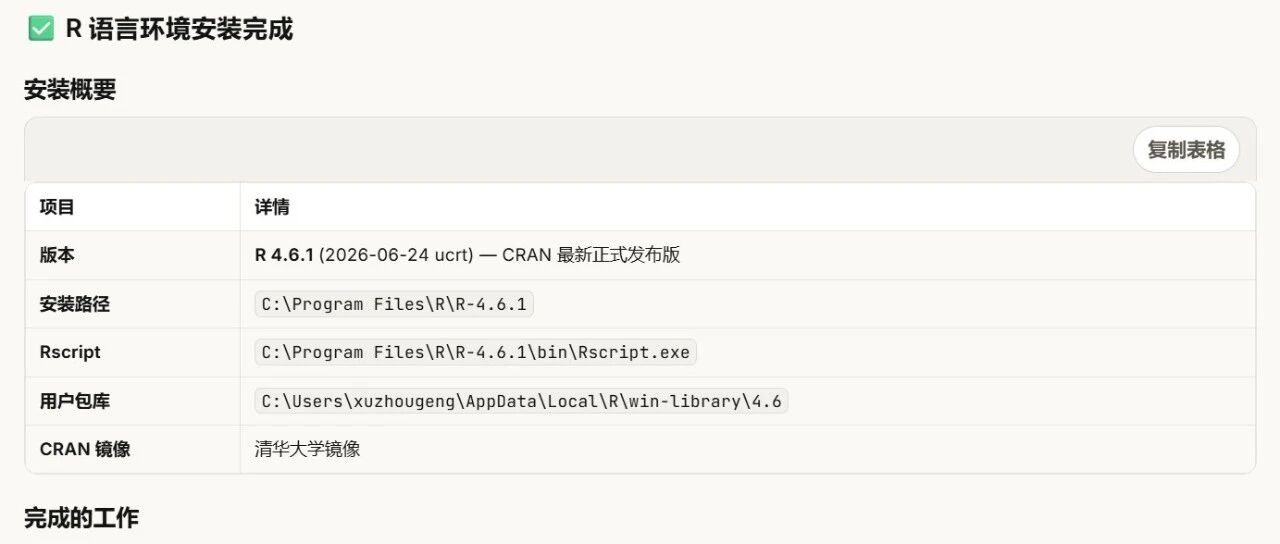
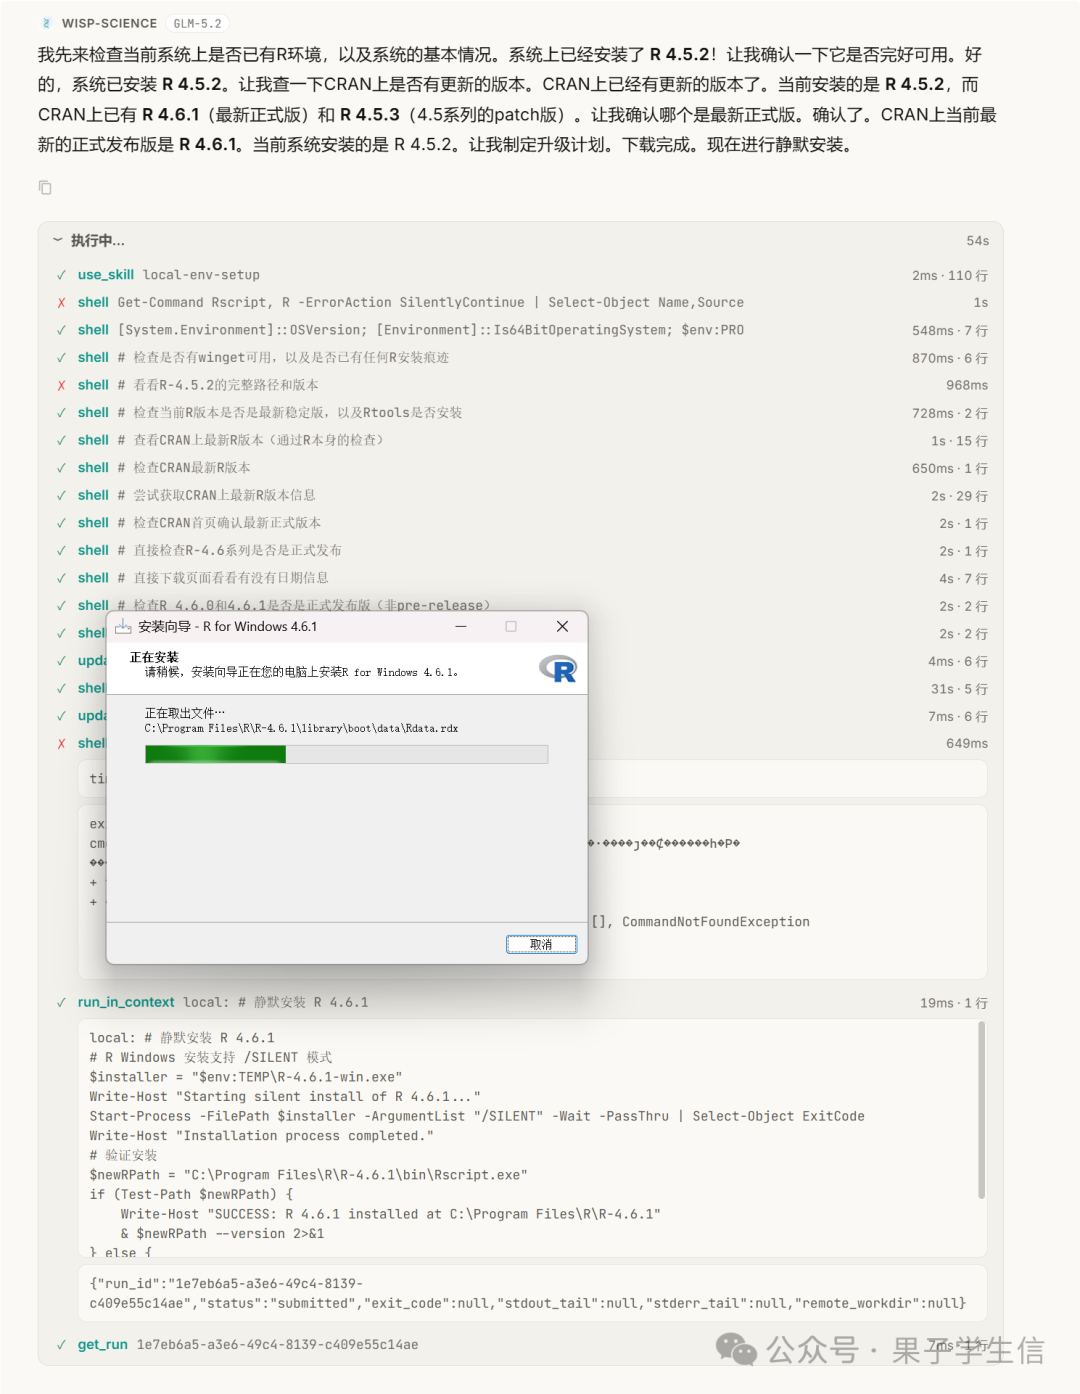
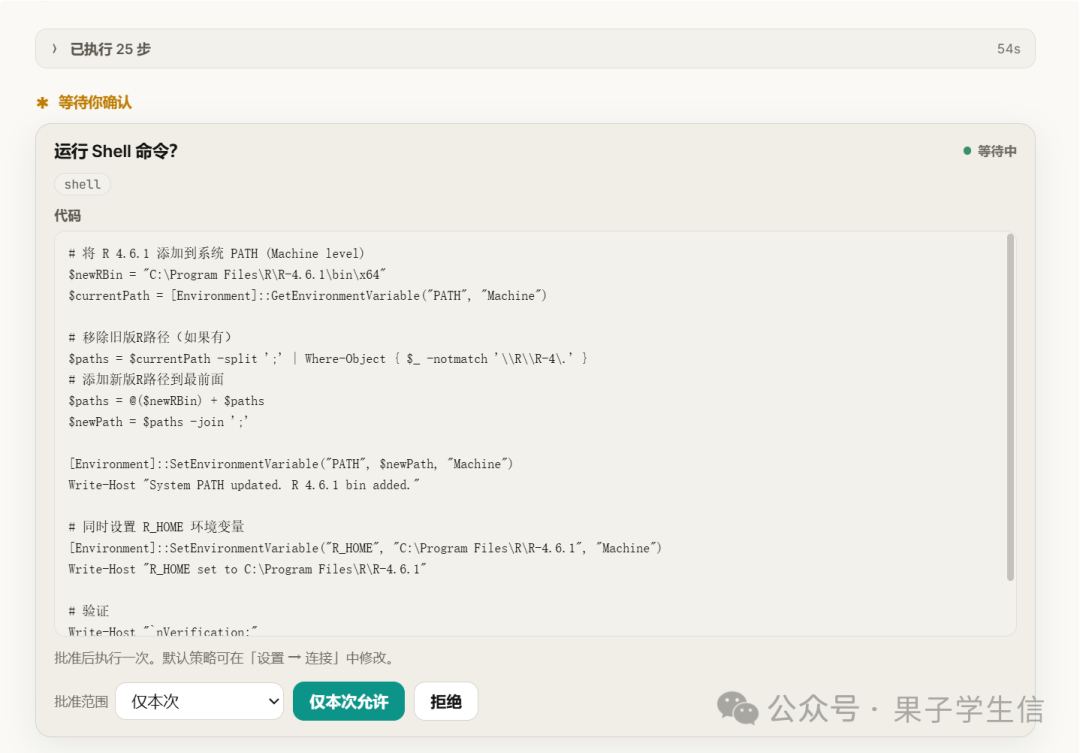
The article demonstrates a direct request such as “install the latest R environment on this computer.” A safer reusable request first asks Wisp Science to inspect the operating system and any existing R installation, show the proposed commands and target version, and wait for approval before changing the machine.
Installing R can download software, modify system paths, or require administrator privileges. Treat every approval prompt as a real review point rather than a button to click automatically.
- Check the package source, destination path, requested privileges, and exact command.
- Prefer official R repositories or a trusted operating-system package manager.
- Reject unexplained deletion, overwrite, permission, or system-wide changes.
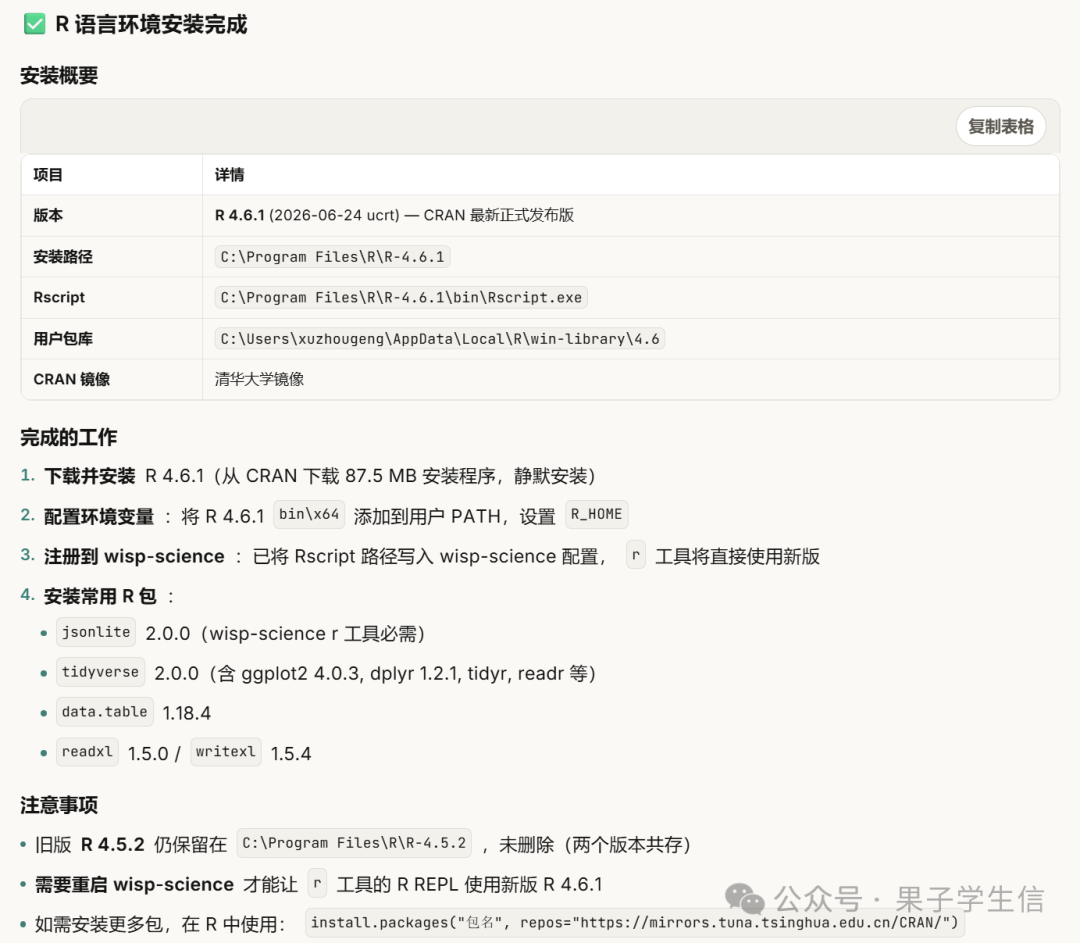
- After installation, run `R --version` and save the result in the project.

3. Install the packages you need—and record what was installed
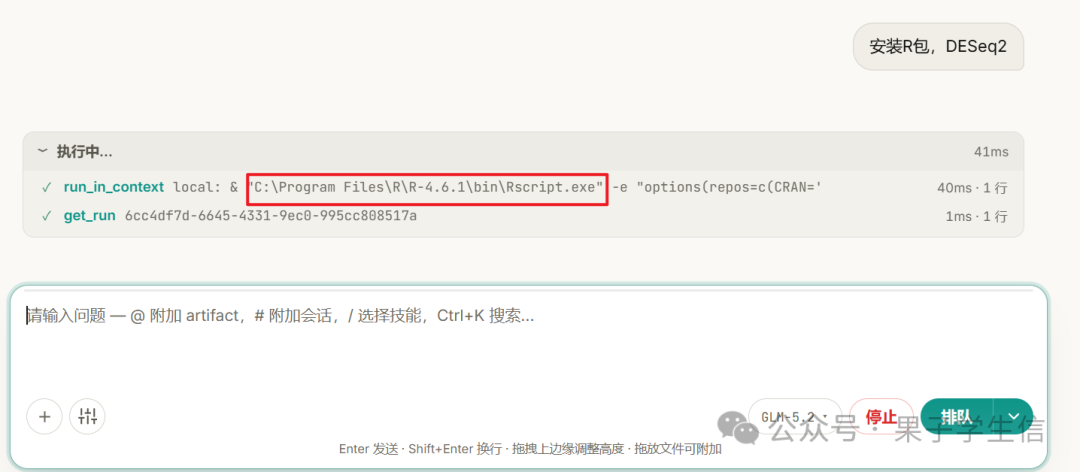
The article shows that package installation can begin by naming the required R packages. Names alone are not enough for reproducibility: repositories, R compatibility, and resolved package versions change over time.
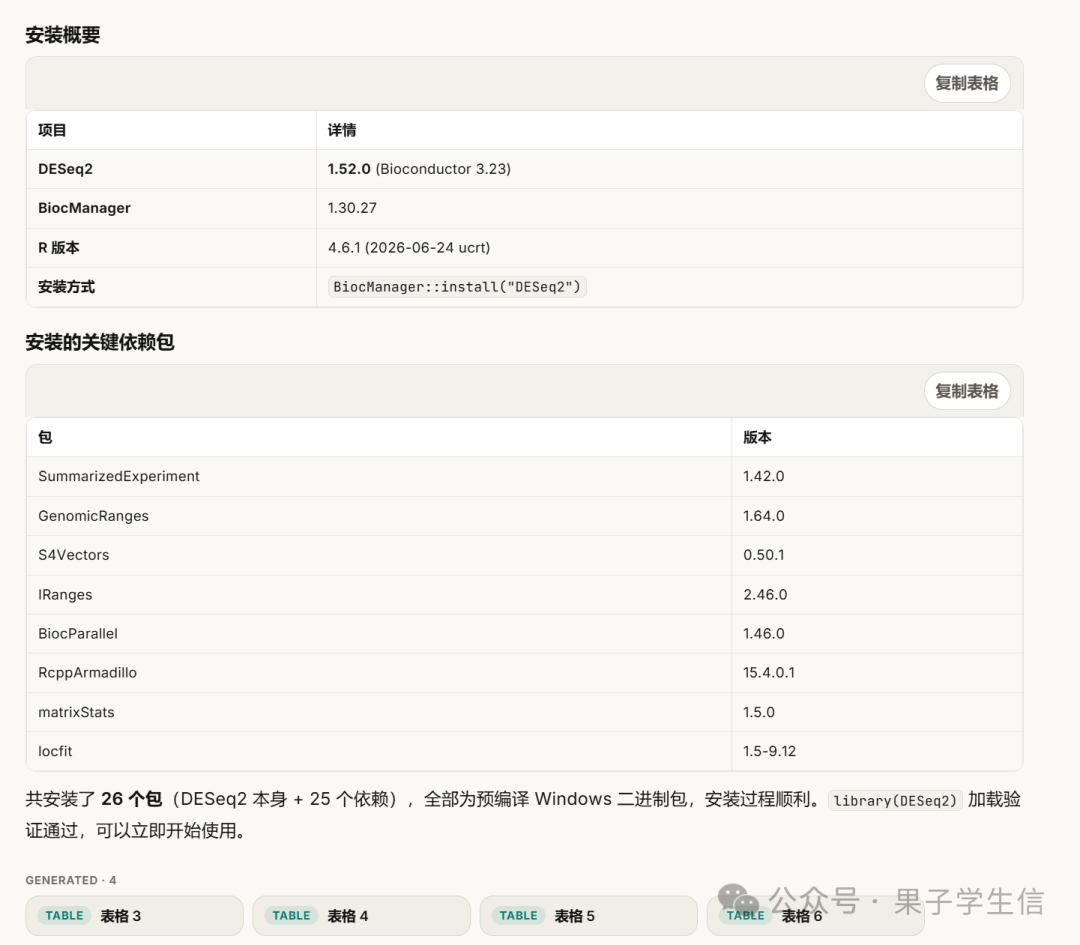
Ask Wisp Science to report `R.version.string`, `sessionInfo()`, and package versions. For Bioconductor work, record its release as well; an optional `renv` lockfile can preserve a long-lived project dependency set.
- Install only packages required by the analysis plan.
- Distinguish CRAN packages from Bioconductor and other sources.
- Save installation output and warnings, not only the final success state.
- Avoid updating the entire environment midway through an analysis without review.
4. Import data according to its size and sensitivity
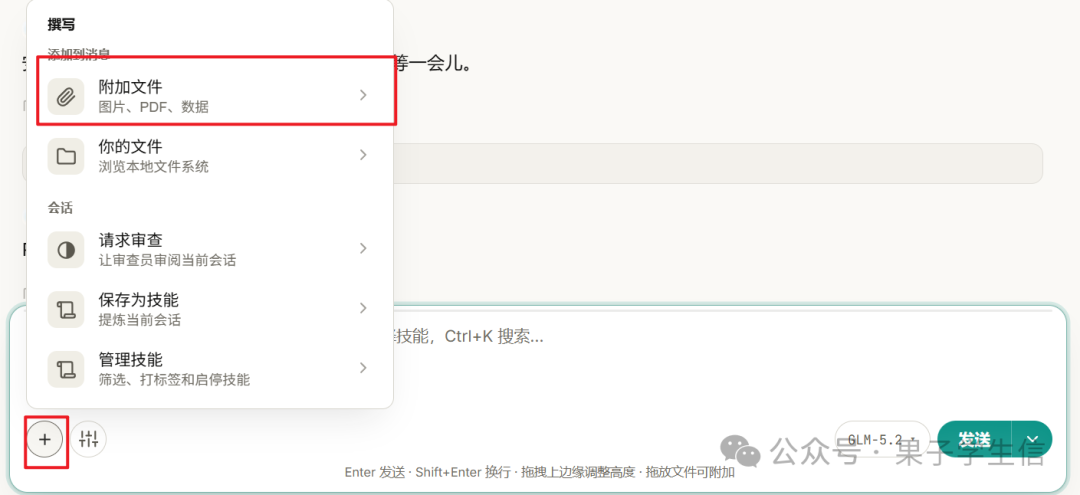
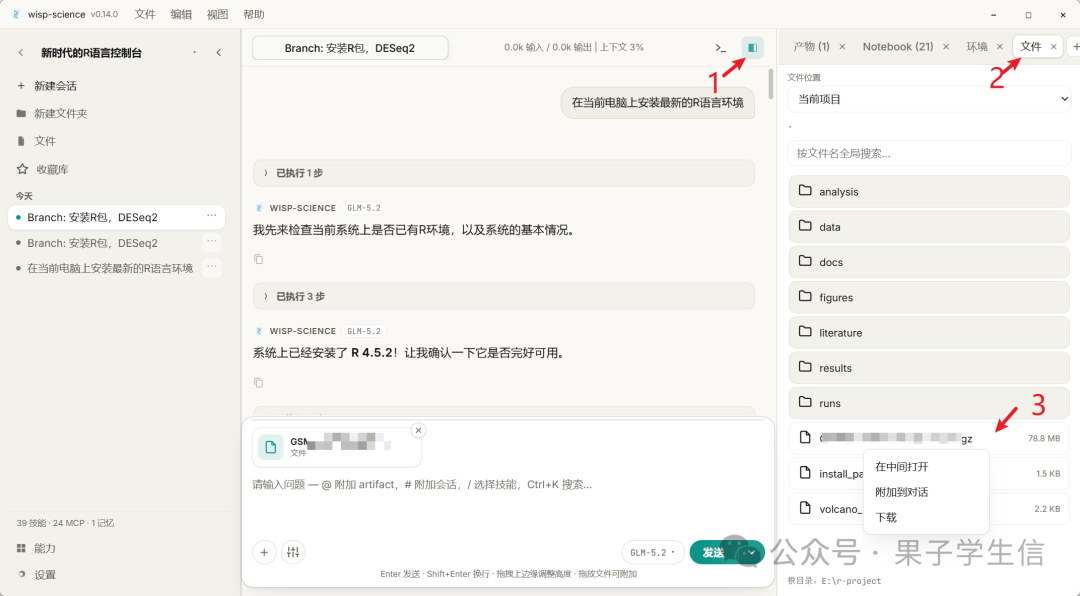
For smaller files, the walkthrough uses drag-and-drop or attachments. If a file is too large, copy it into the project directory and give the agent its relative path instead of repeatedly trying to place the whole dataset in the conversation.
Keep an unchanged input under a path such as `data/raw` and write derived files elsewhere. Before analysis, inspect file size, dimensions, columns, data types, missing values, identifiers, and group labels.
- Copy the source file instead of moving or overwriting the only original.
- Use stable filenames and relative project paths.
- Confirm delimiter, text encoding, sheet name, and identifier columns.
- For sensitive data, review what project content may be sent to the configured model provider.
5. Replace “analyze this” with an explicit analysis contract
State the research goal, input files, key variables, comparisons, required checks, expected tables and figures, and output directory. Ask Wisp Science to present the plan first so incorrect assumptions can be corrected before a long job starts.
Once the plan, paths, and approvals are settled, a longer analysis can continue while you work elsewhere. Returning to completed figures is convenient, but polished output is not evidence that the method was correct.
- Define the question and comparison before selecting a statistical method.
- Require the workflow not to modify raw data.
- Set intermediate checkpoints for expensive or irreversible steps.
- Require scripts, logs, tables, and figures—not only a prose answer.
6. Treat generated results as material for review
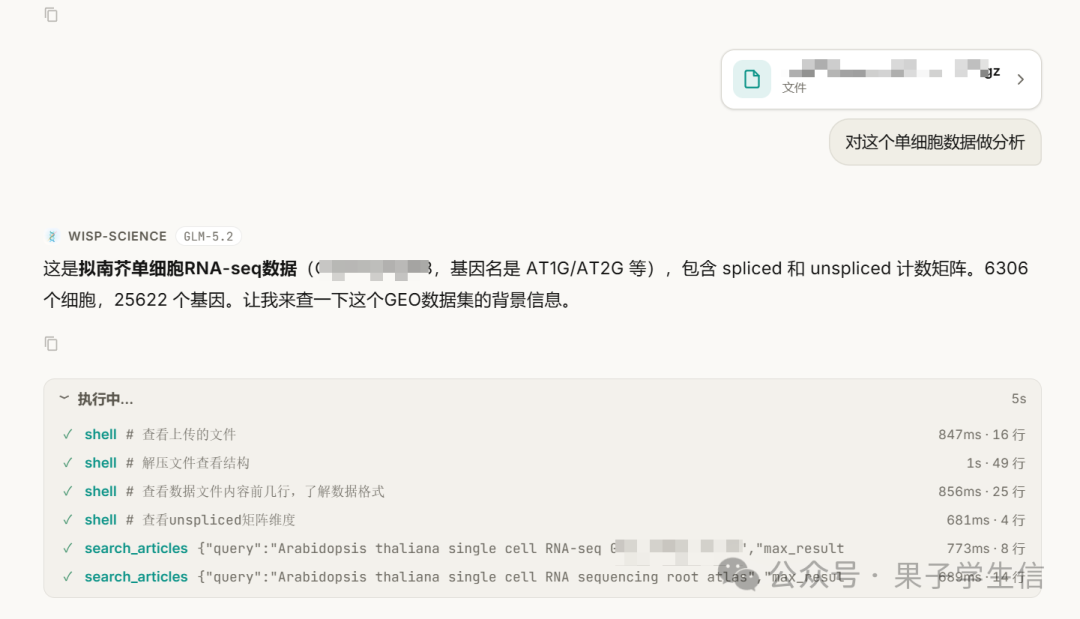
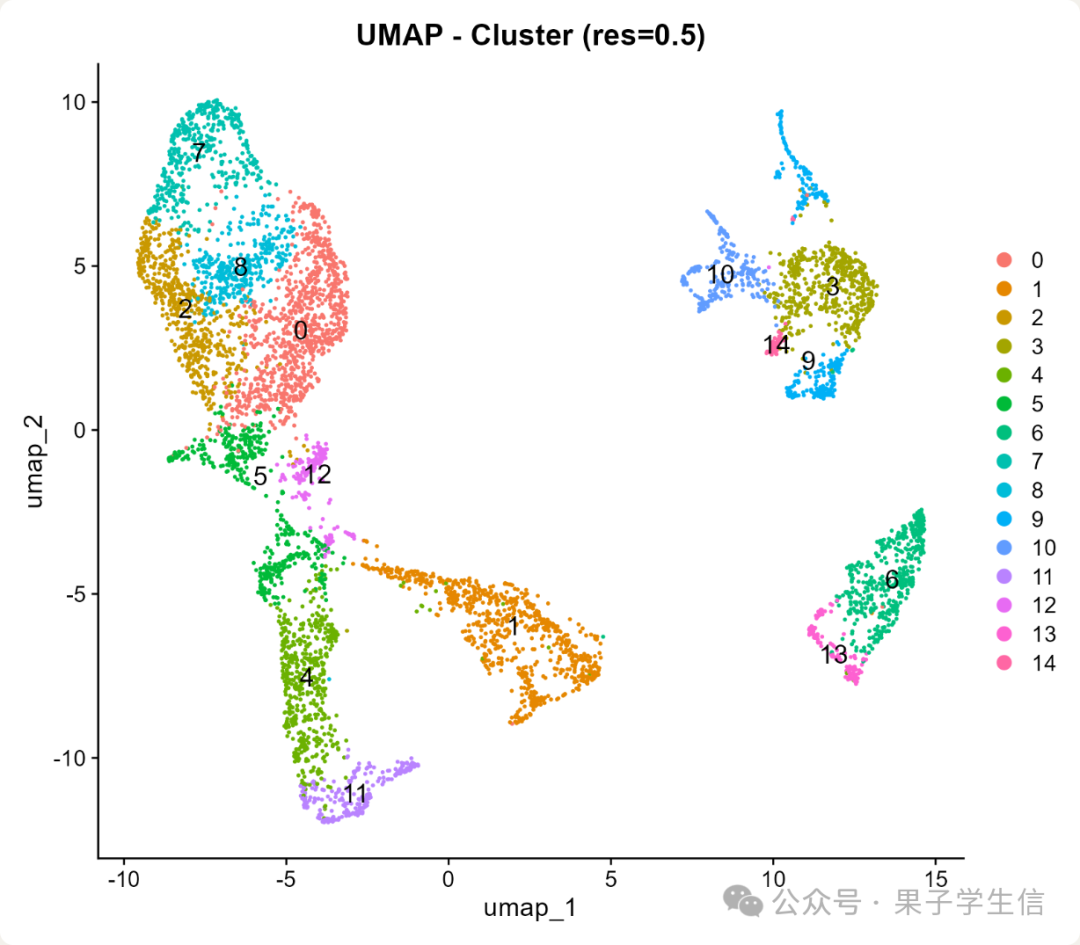
The final step in the article is to inspect the completed analysis and figures. Begin by checking that the intended input was read, expected rows or samples were retained, and no hidden error changed the analysis path.
Compare interpretation with saved code, logs, tables, and plots. Rerun a key summary or figure from a fresh session when possible. Wisp Science accelerates execution and organizes artifacts; statistical validity and domain interpretation remain the researcher’s responsibility.
- Verify dimensions, missing values, group sizes, filtering, and transformations.
- Read warnings and failed commands as well as the final success message.
- Confirm that R and package versions match the methods record.
- Check that figures agree with their source tables and captions.
- Record assumptions, limitations, and manual corrections.
SUMMARY
Key takeaways
- 01
A durable analysis starts with a project boundary and an explicit plan.
- 02
Safety approval means reviewing the proposed command and its scope.
- 03
R and package versions belong beside the code and results.
- 04
Large files can be referenced from the project instead of forced through an attachment.
- 05
Generated figures are outputs to inspect, not automatic proof of a conclusion.
- 06
Code, logs, tables, environment details, and interpretation form one reviewable record.
Source and attribution
Source and attribution
Adapted with authorization from “2026年学习R语言进行数据分析的新姿势,” published by 果子学生信 on July 15, 2026. This guide preserves the original workflow and screenshots while adding safety, version-recording, large-file handling, and result-review guidance.
Original publisher: 果子学生信